Importing Your First Recipe
Learn how to import recipes from any website in under 60 seconds using our AI-powered import feature.
Written By Michelle Mayes
Last updated 10 months ago
What You'll Learn
How to import recipes from any website or blog
What information gets automatically extracted
How to review and edit imported recipes
Troubleshooting common import issues
Tips for successful recipe imports
Quick Start: Import in 3 Seconds
Go to Recipes → Click "Add Recipe" → "Import from URL"
Paste the recipe URL from any website
Click "Import Recipe"
Review the extracted information
Click "Save Recipe"
That's it! Your recipe is now in your collection.
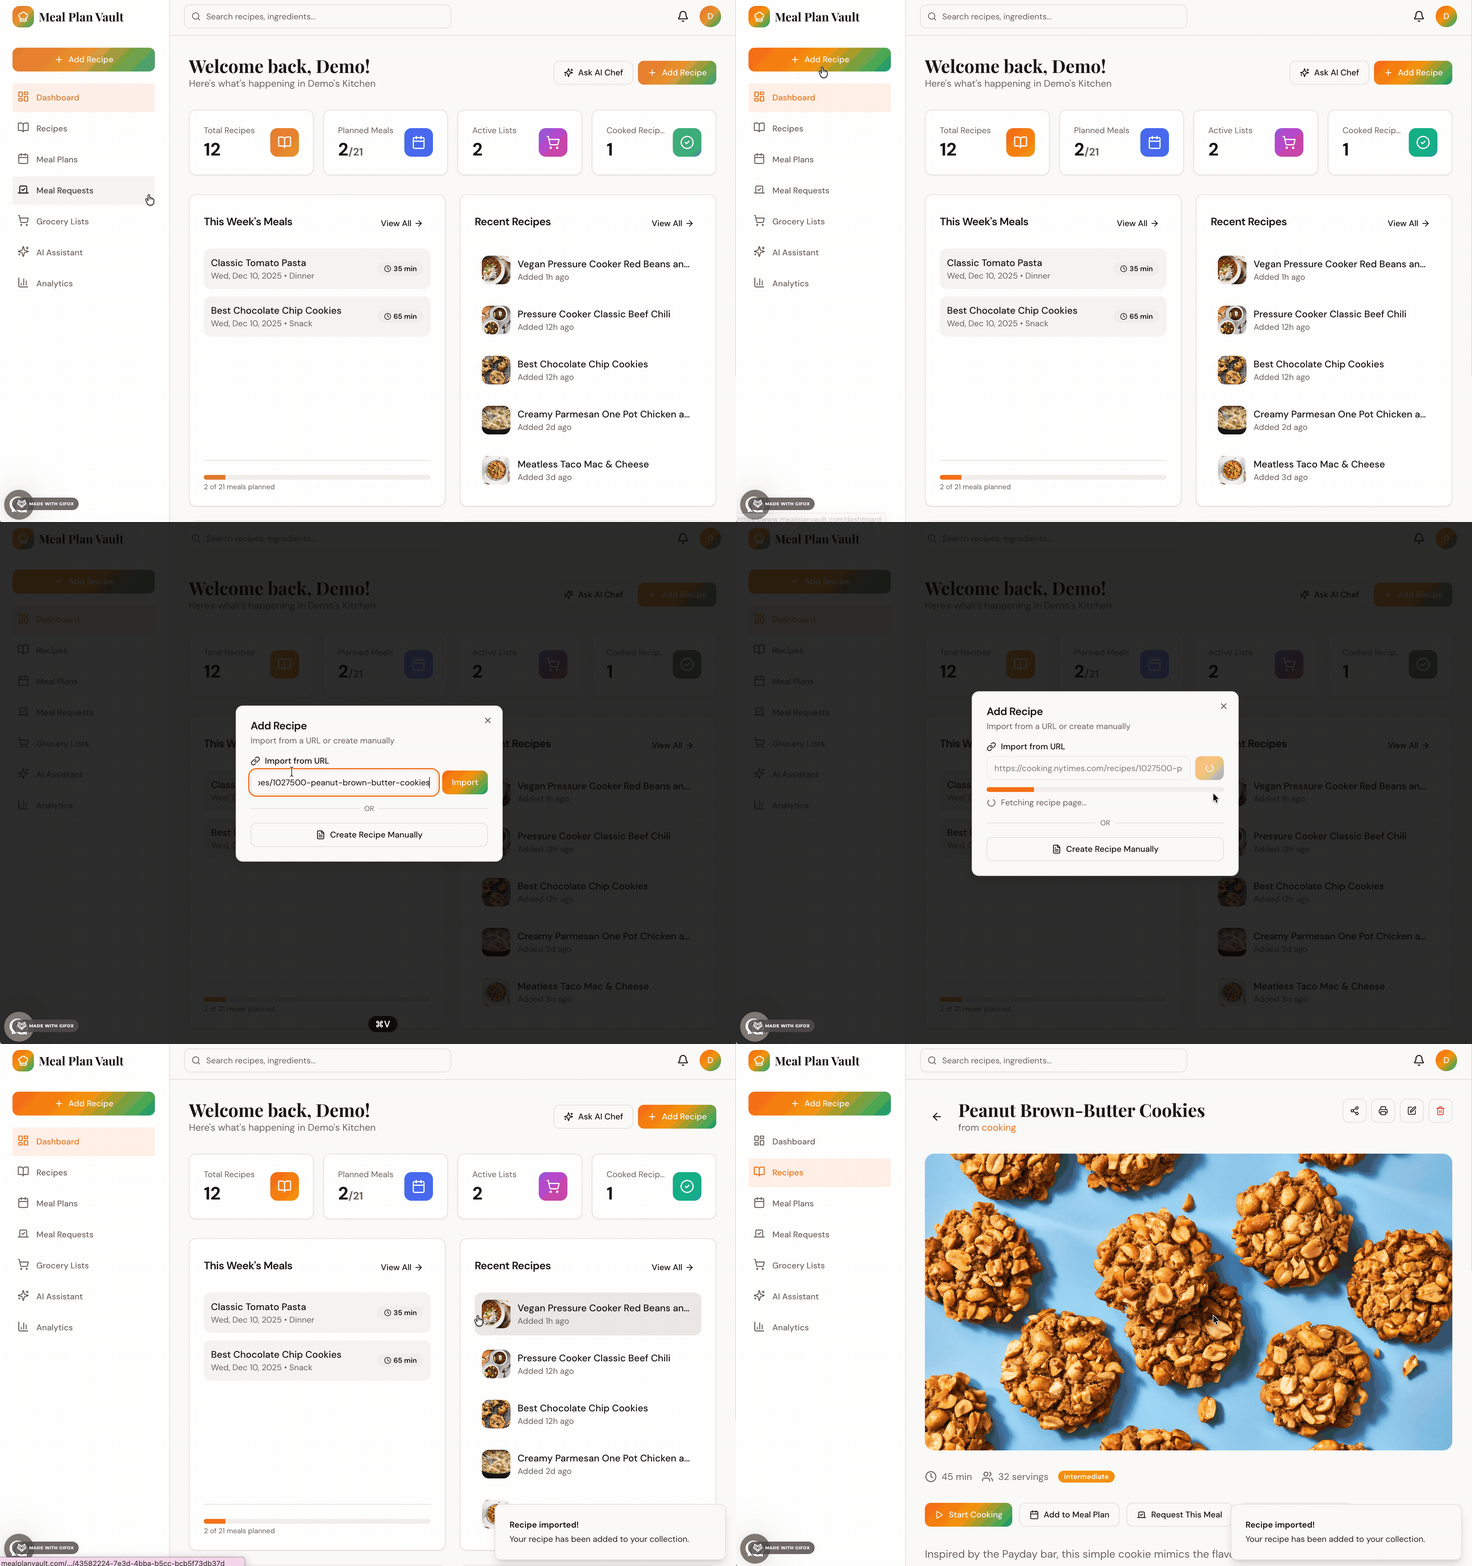
How Recipe Import Works
Our AI-powered import system can extract recipes from virtually any website, including:
Food Blogs - AllRecipes, Food Network, Serious Eats, etc.
Recipe Websites - BBC Good Food, Bon Appétit, etc.
Personal Blogs - Any blog with recipe content
News Sites - Recipe articles from news websites
Social Media - Recipe posts (when shared as links)
What Gets Extracted Automatically
The AI extracts:
✅ Recipe title
✅ Description or intro text
✅ Ingredients with quantities and units
✅ Step-by-step instructions
✅ Prep time and cook time (if available)
✅ Number of servings
✅ Recipe image (hero image)
✅ Source URL and source name
Step-by-Step Import Process
Step 1: Find a Recipe URL
Navigate to any recipe website and copy the URL from your browser's address bar.
Tip: Make sure you're on the actual recipe page, not a category or search results page.
Step 2: Start the Import
In The Meal Plan Vault, click "Recipes" in the navigation
Click the "Add Recipe" button
Select "Import from URL" from the dropdown
Paste the recipe URL into the input field
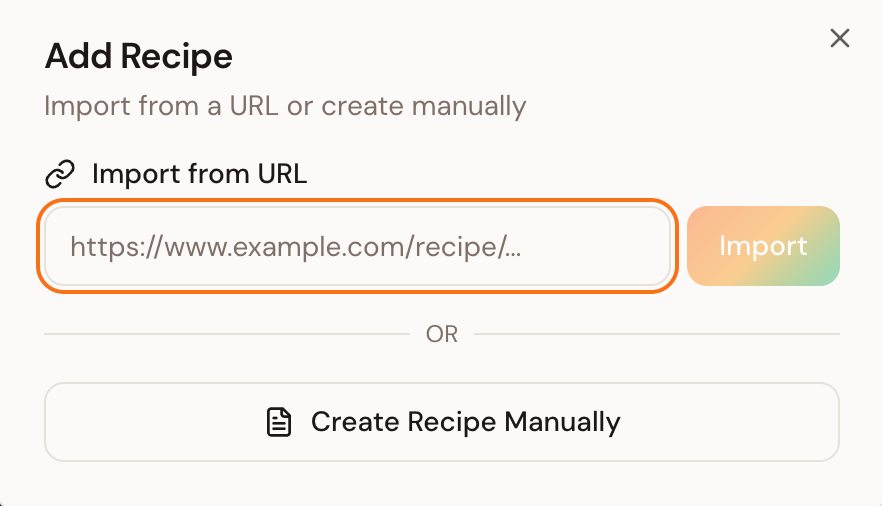
Step 3: Review Extracted Information
After clicking "Import Recipe," you'll see a preview of the extracted data:
Recipe Details - Title, description, times, servings
Ingredients List - All ingredients with quantities
Instructions - Step-by-step cooking directions
Image - Hero image from the recipe
Step 4: Edit if Needed
You can edit any field before saving:
Fix ingredient quantities or units
Adjust prep/cook times
Modify instructions
Add or remove ingredients
Change the recipe title
Tip: Most imports are accurate, but always review ingredients and instructions for accuracy.
Step 5: Add Tags and Notes
Before saving, consider:
Adding Tags - Organize by cuisine, dietary needs, meal type, or any other tag you want
Adding Notes - Private notes about modifications or tips
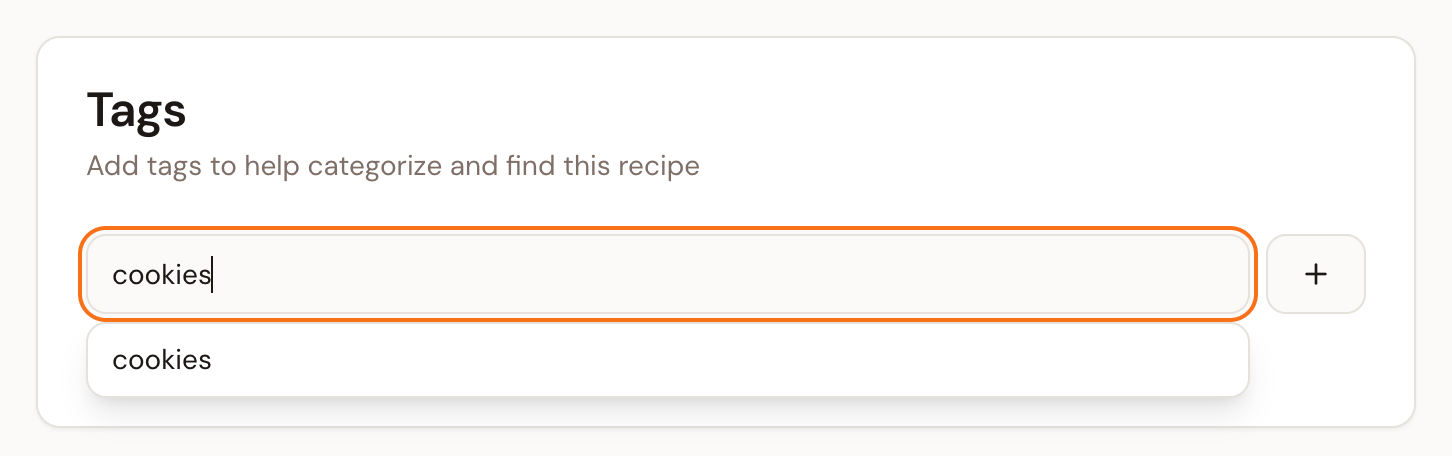
Step 6: Save Your Recipe
Click "Save Changes" at the bottom of the page to update the recipe. You'll be redirected to the recipe detail page where you can:
View the full recipe
Edit it anytime
Add it to meal plans
Automatically share it with your household
Advanced Import Tips
Importing Multiple Recipes
To build your collection quickly:
Open multiple recipe tabs in your browser
Import one recipe at a time
Use the browser back button to return to the import page
Repeat for each recipe
Handling Import Errors
If an import fails or looks incorrect:
Check the URL - Make sure it's the actual recipe page
Try Again - Sometimes the website takes a moment to load
Manual Creation - If import consistently fails, create the recipe manually
Report the Issue - Let us know which website isn't working, message us via the Support widget in the bottom left corner of the app
Importing from PDFs or Images
Currently, we support URL imports only. For recipes in PDFs or images:
Copy the text manually
Create the recipe manually using our recipe editor
Or find the recipe online and import from the website
What to Do After Importing
Organize Your Recipes
Add Tags - Tag by cuisine (Italian, Mexican, etc.), dietary needs (vegetarian, gluten-free), or meal type
Create Collections - Group related recipes together
Rate Recipes - Rate recipes after trying them to remember favorites
Use Your Recipes
Add to Meal Plans - Drag recipes onto your meal plan calendar
Generate Grocery Lists - Create shopping lists from meal plans
Share with Household - All household members can see your recipes
Common Issues & Solutions
"Import failed - unable to extract recipe"
Possible Causes:
The URL doesn't point to a recipe page
The website requires login or has paywall
The website structure isn't recognized
Solutions:
Verify you're on the recipe page (not category/search page)
Try a different recipe from the same site
Create the recipe manually if import consistently fails
"Ingredients are missing or incorrect"
Solution: This is rare, but can happen with unusual website formats. Simply edit the ingredients after import before saving.
"The recipe image didn't import"
Solution: Some websites protect images. You can:
Add an image manually after import
Use the source website's image URL
Leave it blank - the recipe will still work perfectly
"Import is taking too long"
Solution:
Check your internet connection
Some complex websites take 10-15 seconds to process
If it takes longer than 30 seconds, try again or create manually
Best Practices
Before Importing
Verify the Recipe - Make sure it's a recipe you actually want to try
Check the Source - Import from reputable sources for best results
Have the URL Ready - Copy the URL before starting the import
After Importing
Review Everything - Always check ingredients and instructions
Add Tags Immediately - Tag while the recipe is fresh in your mind
Test the Recipe - Try it and add notes about modifications
Building Your Collection
Start with Favorites - Import recipes you know and love first
Import in Batches - Set aside time to import 10-15 recipes at once
Organize as You Go - Add tags during import to stay organized
Tips & Tricks
Finding Recipes to Import
Save Recipes as You Browse - When you find a recipe you like, import it immediately
Use Recipe Aggregators - Sites like AllRecipes and Food Network work great
Organizing Imported Recipes
Use Consistent Tagging - Create a tagging system (e.g., "quick", "vegetarian", "meal-prep")
Add Source Tags - Tag by source website to remember where recipes came from
Next Steps
Now that you can import recipes, try:
Creating Your First Meal Plan - Use your imported recipes to plan meals
Organizing Your Recipes - Learn about tags, collections, and search
Using Recipe Notes - Add personal notes and modifications
Sharing Recipes with Household - Make recipes available to family members
Still Need Help?
Troubleshooting Guide
Related Articles:
Creating Recipes Manually
Organizing Your Recipes
Recipe Notes & Customization
Getting Started Guide