Getting Started
Complete onboarding guide to get you up and running with The Meal Plan Vault in minutes.
Written By Michelle Mayes
Last updated 10 months ago
What You'll Learn
How to create your account and complete initial setup
How to navigate the dashboard
How to import or create your first recipe
How to create your first meal plan
Next steps to maximize your meal planning success
Welcome to The Meal Plan Vault
The Meal Plan Vault is your all-in-one solution for recipe management, meal planning, and grocery shopping. Whether you're a busy parent trying to feed a family, a meal prep enthusiast, chef for a large household, or simply someone looking to eat healthier and cook at home, we've got you covered.
What Makes Us Different
AI-Powered Recipe Import - Import recipes from any website with one click
Smart Meal Planning - Drag-and-drop calendar with AI suggestions
Household Collaboration - Plan meals together with your family
Auto-Generated Grocery Lists - Never forget an ingredient again
AI Chef Assistant - Get instant help with cooking questions
Step 1: Create Your Account
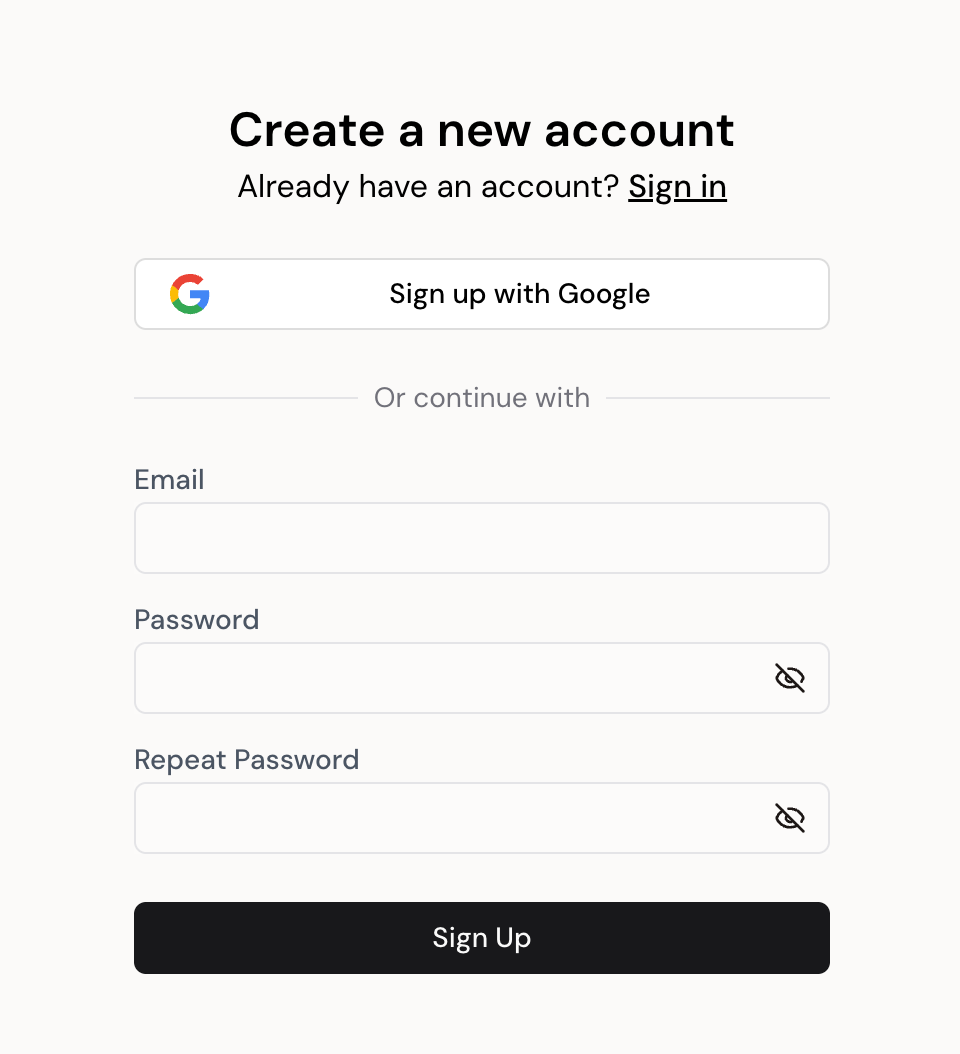
Sign Up Options
You can create an account using:
Google Sign-In (Recommended) - Quick and secure
Email and Password - Traditional sign-up
Account Setup
Click "Sign Up" on the landing page
Choose your preferred sign-in method
If using email, verify your email address
Complete your profile:
Display name (auto-filled from Google if applicable)
Household name (you can change this later)
Note: Your display name will be visible to household members.
Step 2: Explore Your Dashboard
After signing up, you'll land on your dashboard. Here's what you'll see:
Main Navigation
Dashboard - Overview of your meal plans and upcoming meals
Recipes - Your recipe collection
Meal Plans - Weekly and monthly meal calendars
Grocery Lists - Shopping lists generated from your meal plans
AI Assistant - Your personal cooking assistant
Dashboard Overview
Your dashboard shows:
Upcoming Meals - What's planned for this week
Recent Recipes - Your most-used recipes
Pending Meal Requests - Meals requested by household members
Quick Actions - Fast access to common tasks
Step 3: Add Your First Recipe
You have two options for adding recipes:
Option A: Import from a Website (Fastest)
Click "Recipes" in the navigation
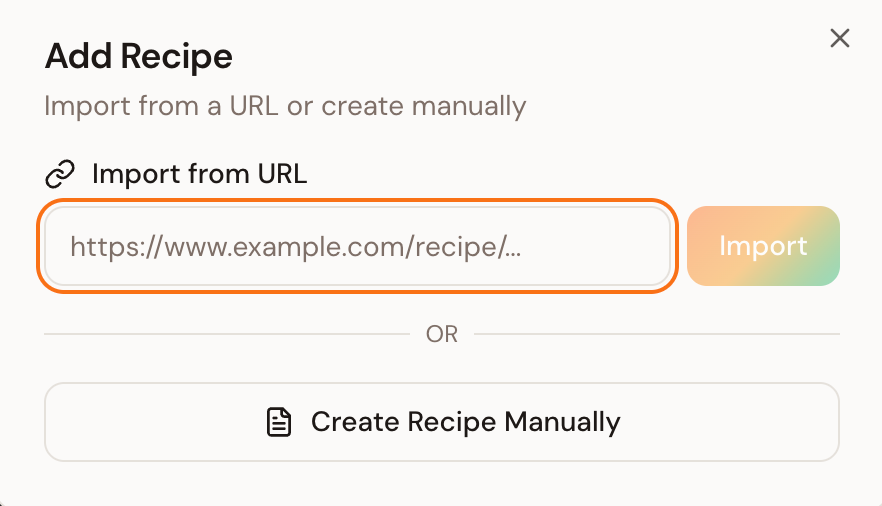
Click "Add Recipe" → "Import from URL"
Paste the recipe URL from any cooking website
Click "Import Recipe"
Review and edit if needed
Click "Save Recipe"
Supported Sources:
Food blogs (AllRecipes, Food Network, etc.)
Recipe websites
Personal blogs with recipes
Any website with recipe content
Tip: The AI will automatically extract ingredients, instructions, prep time, and more. You can always edit these after import.
Option B: Create Manually
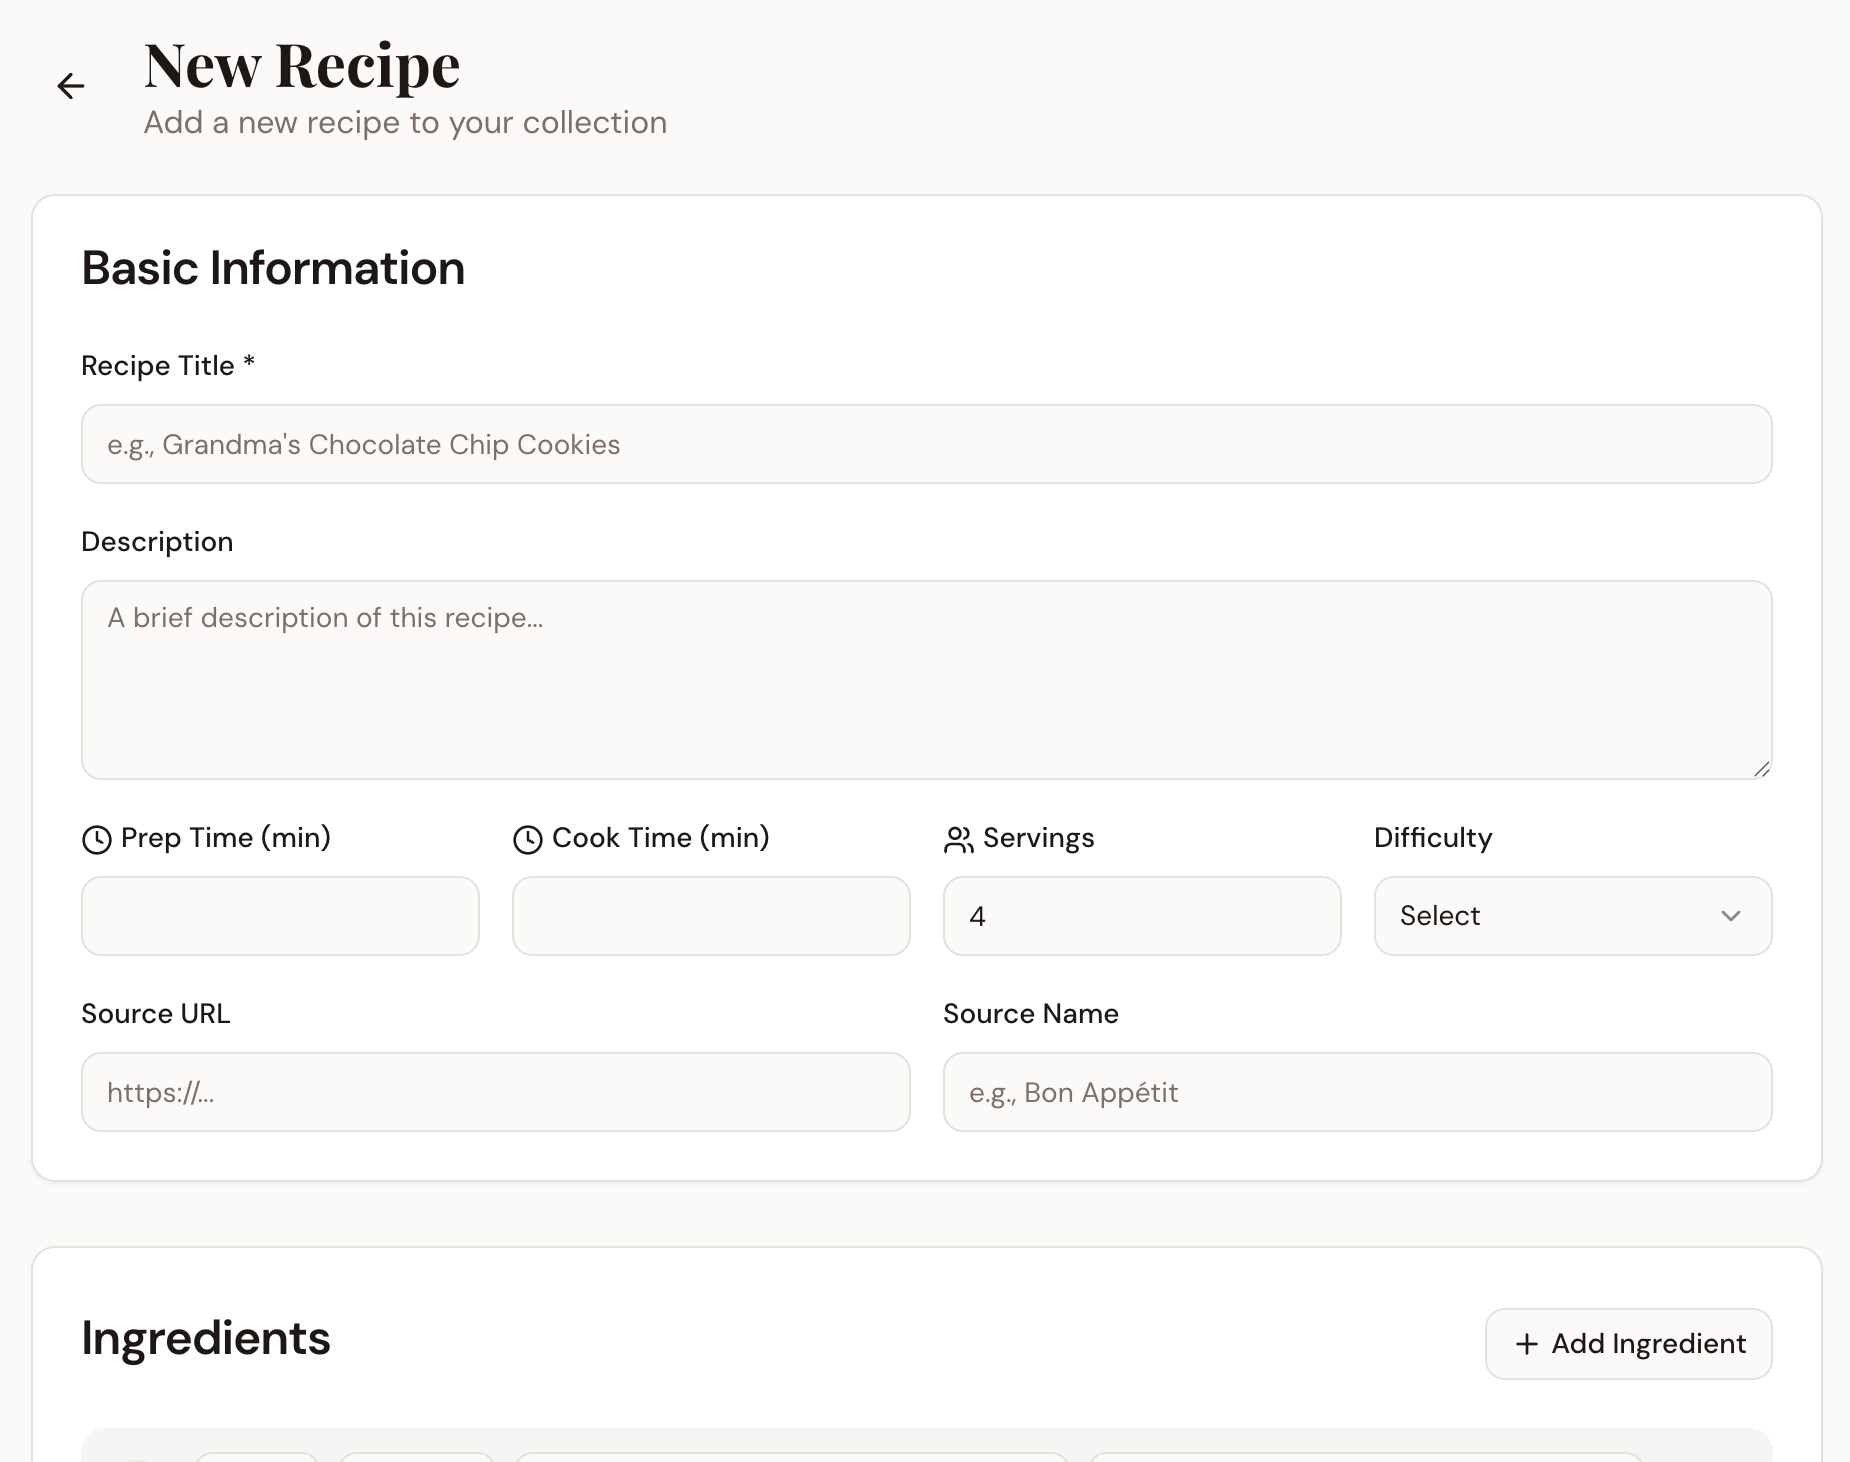
Click "Recipes" → "Add Recipe"
Fill in the recipe details:
Title (required)
Description
Prep time and cook time
Number of servings
Difficulty level
Add ingredients with quantities
Add step-by-step instructions
Add tags for easy organization
Click "Save Recipe"
Step 4: Create Your First Meal Plan
Now that you have recipes, let's plan your week:
Click "Meal Plans" in the navigation
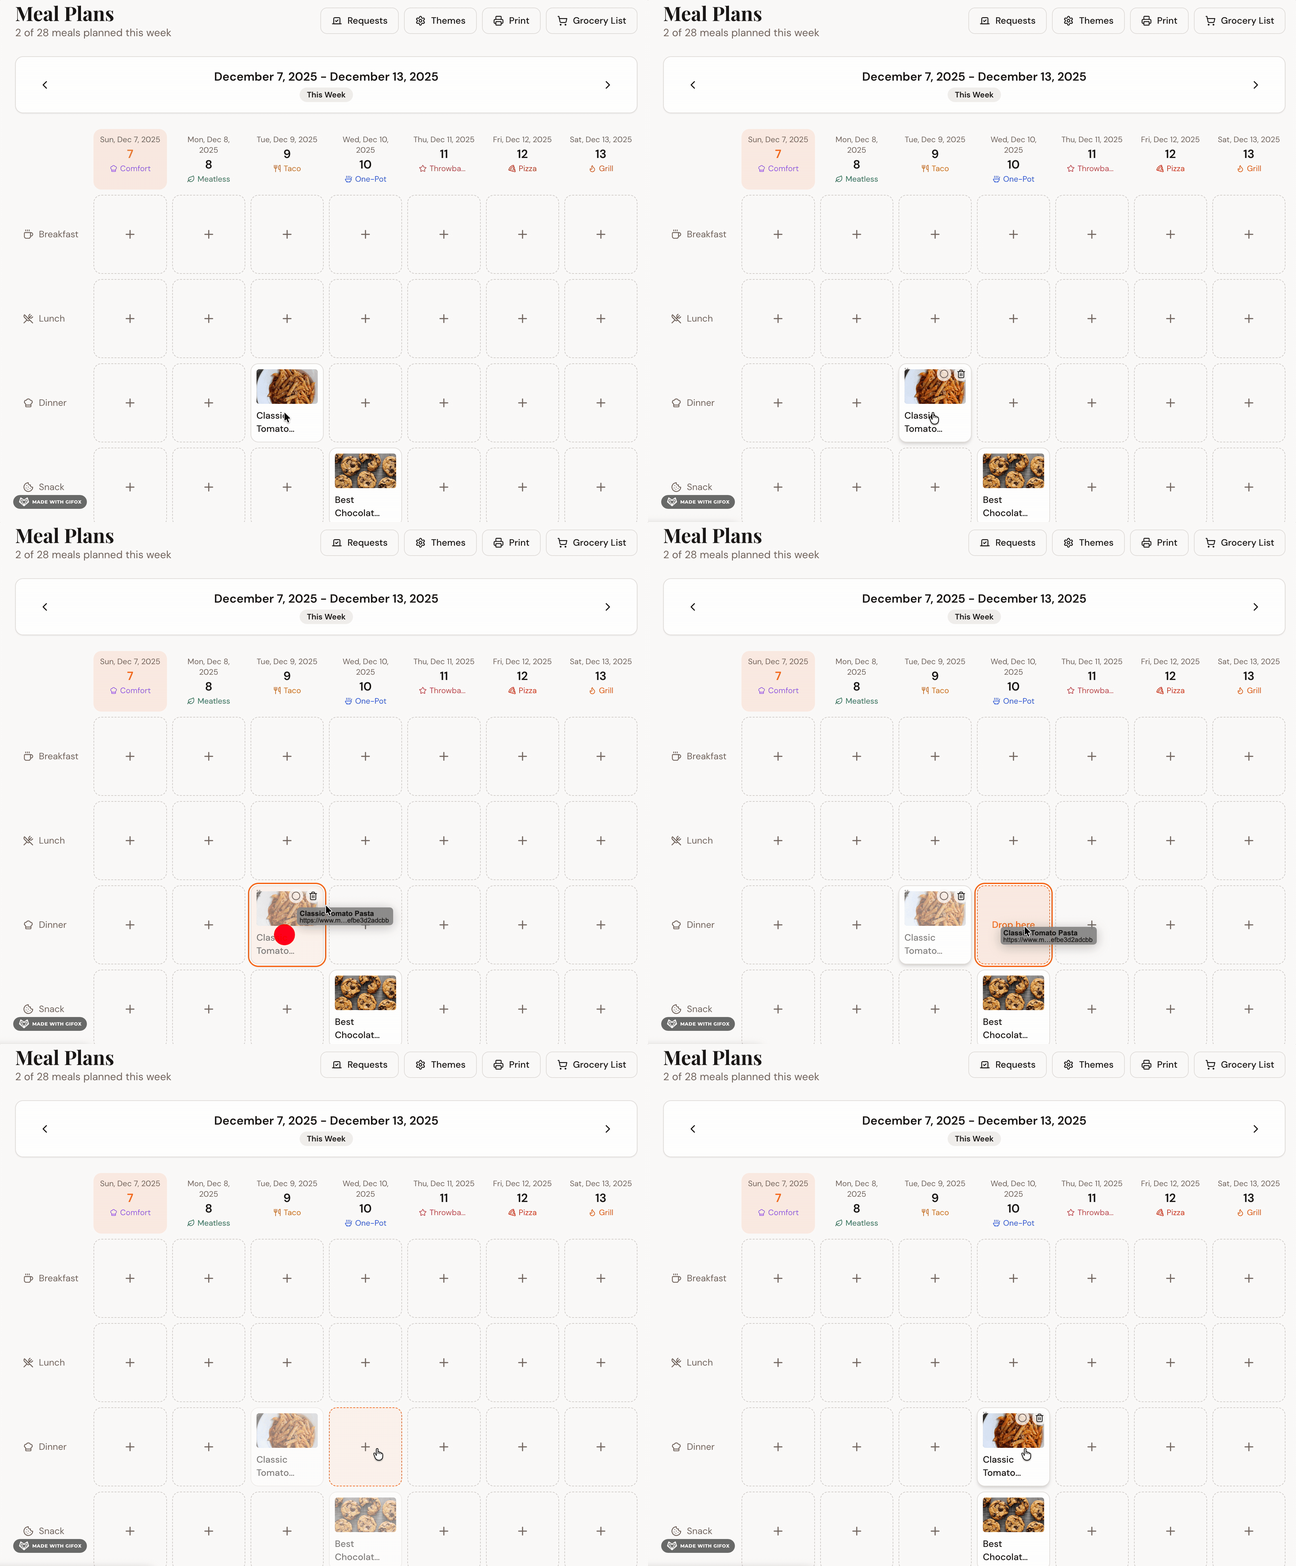
You'll see a weekly calendar view
Click a meal slot
Select a recipe for that meal
Repeat for other meals throughout the week
Drag and drop to move the meal to another slot
Meal Types
By default, you can plan:
Breakfast
Lunch
Dinner
Snacks
You can customize these in Settings → Preferences → Meal Types.
Tip: Start with just dinners for your first week. You can always add more meal types later.
Step 5: Generate Your First Grocery List
Once your meal plan is set:
Click "Grocery Lists" in the navigation
Click "Create from Meal Plan"
Select the week you want to shop for
Review the auto-generated list
Add any additional items manually
Check off items as you shop
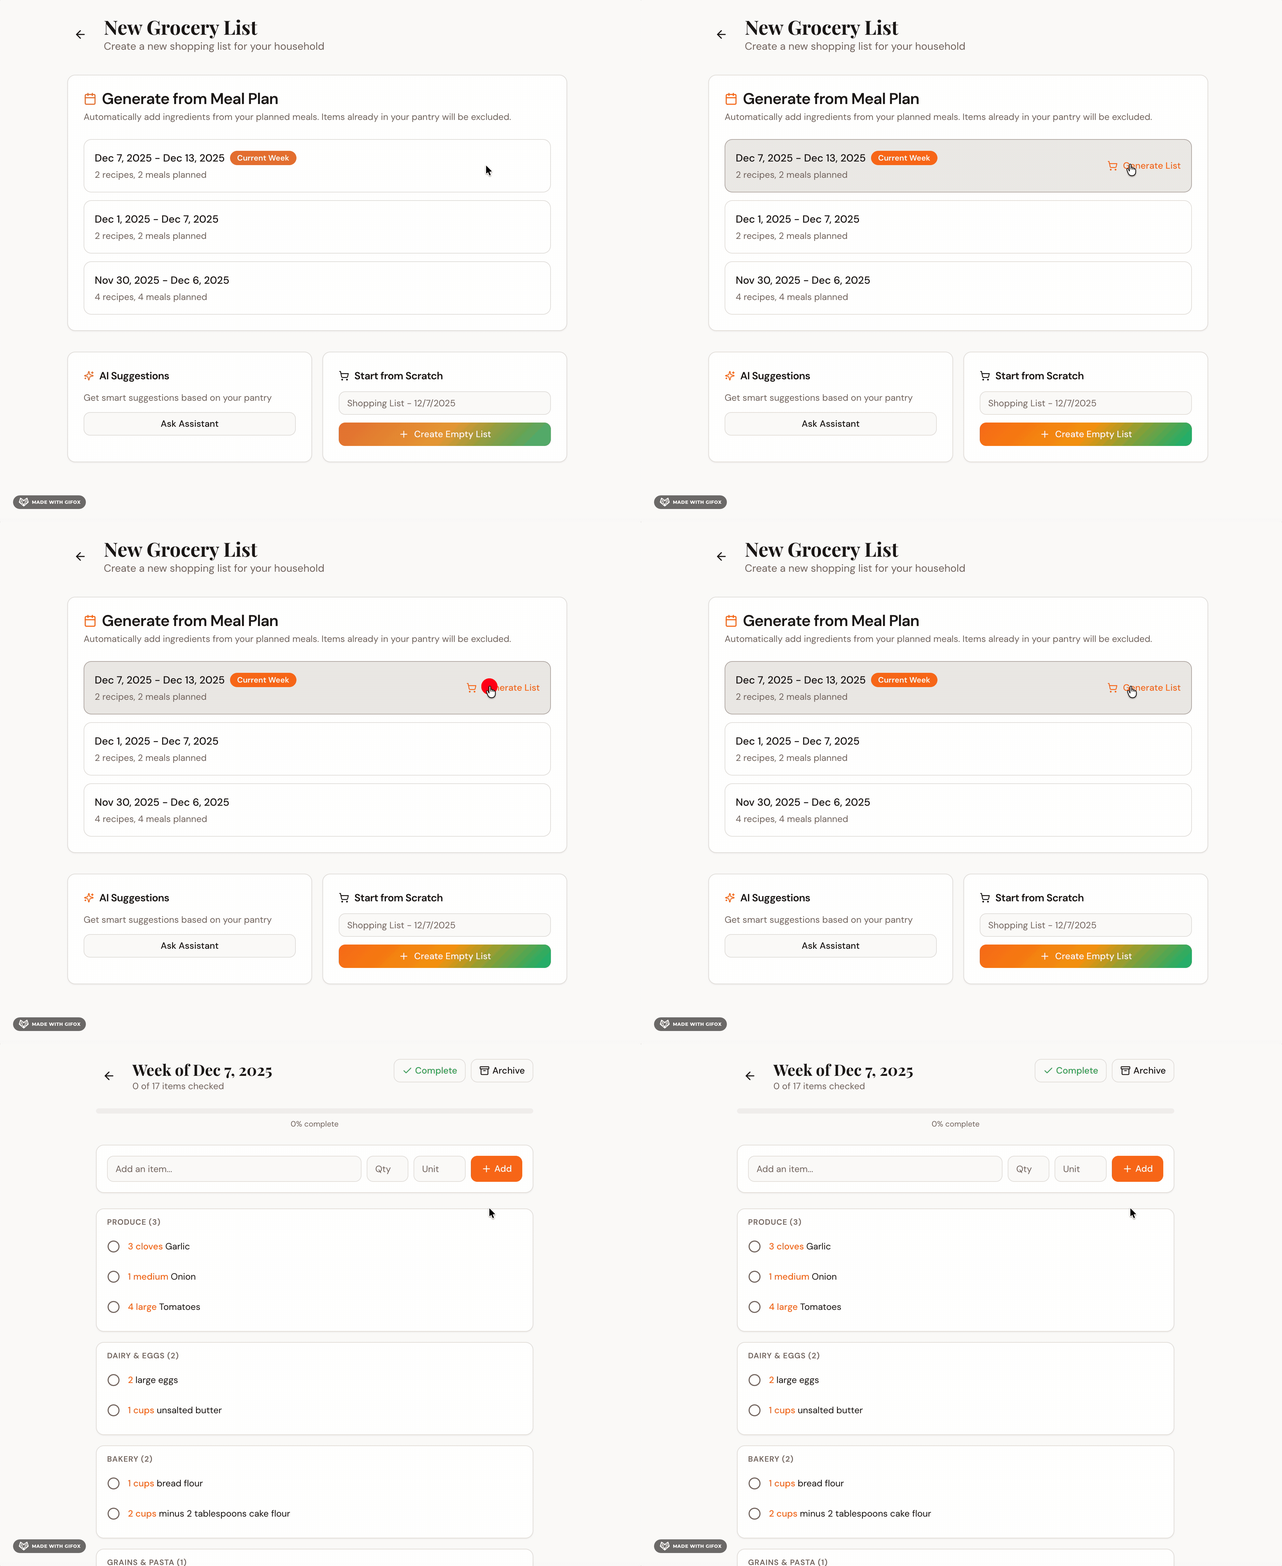
What Gets Added Automatically:
All ingredients from recipes in your meal plan
Quantities are calculated based on servings
Organized by category (produce, dairy, etc.)
Customizing Your Experience
Set Your Preferences
Go to Settings → Preferences to customize:
Week Starts On - Monday or Sunday (default: Monday)
Measurement System - Metric or Imperial
Gradient Theme - Choose your favorite color scheme
Meal Types - Add or remove meal types (Default is Breakfast, Lunch, Dinner, and Snacks)
Notification Settings
Control when you receive emails:
Meal Plan Reminders - Get reminded to plan your week
Weekly Digest - Summary of your week's meals
Meal Requests - Notifications when someone requests a meal
All notifications default to off - opt into only what you want to receive.
Tips & Best Practices
For Your First Week
Start Small - Plan just 3-4 dinners to get comfortable
Use Familiar Recipes - Import recipes you already know and love
Don't Overthink It - You can always adjust your plan later
Building Your Recipe Collection
Import in Bulk - Spend 30 minutes importing 10-15 favorite recipes
Use Tags - Tag recipes by cuisine, dietary needs, or meal type
Add Notes - Use the private notes feature to remember modifications
Meal Planning Success
Plan on the Weekend - Set aside 15 minutes each weekend to plan the week
Check Your Calendar - Account for busy nights and plan accordingly
Leftovers Are Your Friend - Plan meals that make great leftovers without having to plan a recipe for every meal slot
Common Issues
"I can't see my recipes after importing"
Solution: Check that the import completed successfully. If you see an error, try:
Copying the URL again
Checking that the website is accessible
Manually creating the recipe if import fails
"My meal plan isn't saving"
Solution: Make sure you're logged in and have an active internet connection. Try refreshing the page.
"I can't find a feature"
Solution: Check the navigation menu. If you're on mobile, tap the menu icon (☰) to see all options.
Next Steps
Now that you've completed the basics, try:
Importing Multiple Recipes - Build your recipe collection quickly
Setting Up Your Household - Invite family members to collaborate
Using the AI Chef Assistant - Get help with cooking questions
Creating Meal Plan Templates - Save time with reusable plans
Still Need Help?
Browse All Help Articles
Related Articles:
Importing Your First Recipe
Creating Your First Meal Plan
Dashboard Overview
Settings & Preferences